CORE STRENGTHENING EXERCISES
Click on each tab to open or close the stretch detailsABDOMINALS
CRUNCHES
Main Muscle Worked: Abdominals
Equipment: None
Guide:
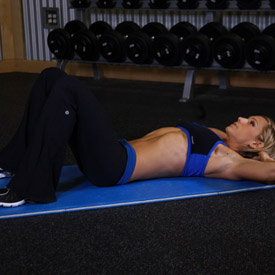
- Lie flat on your back with your feet flat on the ground, or resting on a bench with your knees bent at a 90 degree angle. If you are resting your feet on a bench, place them three to four inches apart and point your toes inward so they touch.
- Now place your hands lightly on either side of your head keeping your elbows in. Tip:Don’t lock your fingers behind your head.
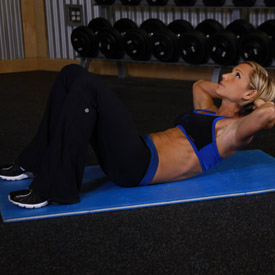
- While pushing the small of your back down in the floor to better isolate your abdominal muscles, begin to roll your shoulders off the floor.
- Continue to push down as hard as you can with your lower back as you contract your abdominals and exhale. Your shoulders should come up off the floor only about four inches, and your lower back should remain on the floor. At the top of the movement, contract your abdominals hard and keep the contraction for a second. Tip: Focus on slow, controlled movement – don’t cheat yourself by using momentum.
- After the one second contraction, begin to come down slowly again to the starting position as you inhale.
- Repeat for the recommended amount of repetitions.
Variations: There are many variations for the crunch. You can perform the exercise with weights, or on top of an exercise ball or on a decline bench.
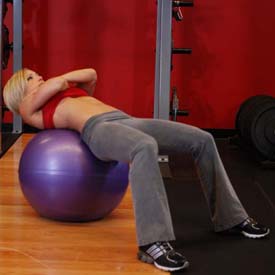
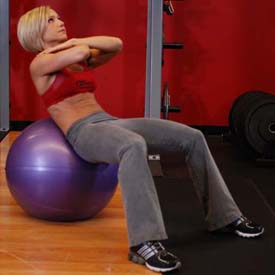
EXERCISE BALL CRUNCH
Main Muscle Worked: Abdominals
Equipment: Exercise Ball
Guide:
- Lie on an exercise ball with your lower back curvature pressed against the spherical surface of the ball. Your feet should be bent at the knee and pressed firmly against the floor. The upper torso should be hanging off the top of the ball. The arms should either be kept alongside the body or crossed on top of your chest as these positions avoid neck strains (as opposed to the hands behind the back of the head position).
- Lower your torso into a stretch position keeping the neck stationary at all times. This will be your starting position.
- With the hips stationary, flex the waist by contracting the abdominals and curl the shoulders and trunk upward until you feel a nice contraction on your abdominals. The arms should simply slide up the side of your legs if you have them at the side or just stay on top of your chest if you have them crossed. The lower back should always stay in contact with the ball. Exhale as you perform this movement and hold the contraction for a second.
- As you inhale, go back to the starting position.
- Repeat for the recommended amount of repetitions.
Caution: Perform this exercise slowly and deliberately as it takes some getting used to. Also, do not be hasty and try to use weights on the first time; you’ll have enough on your hands learning how to balance yourself. Also, if balance is an issue I recommend having a spotter next to you and also placing each of your feet under a 100-lb dumbbell for added stability. As you get more advanced you can hold a dumbbell or a weight plate (held at arms length) on top of your chest. However, you have to be very careful when adding weight to this exercise, because if you add too much too quickly you could get a hernia.
Variations: You can perform this exercise with a low pulley behind you with a rope attached on its end. In this manner you can go ahead and add resistance easier. For this variation, you will need to hold on to the sides of the rope throughout the movement. I like to bring my arms forward to the point that the upper arms are almost parallel to my torso and the lower arms are facing back holding the rope.
AIR BIKE
Main Muscle Worked: Abdominals
Equipment: None
Guide:
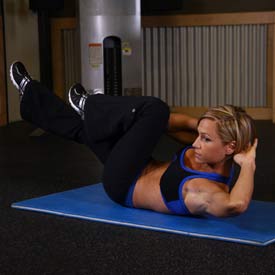
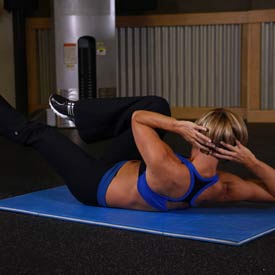
- Lie flat on the floor with your lower back pressed to the ground. For this exercise, you will need to put your hands beside your head. Be careful however to not strain with the neck as you perform it. Now lift your shoulders into the crunch position.
- Bring knees up to where they are perpendicular to the floor, with your lower legs parallel to the floor. This will be your starting position.
- Now simultaneously, slowly go through a cycle pedal motion kicking forward with the right leg and bringing in the knee of the left leg. Bring your right elbow close to your left knee by crunching to the side, as you breathe out.
- Go back to the initial position as you breathe in.
- Crunch to the opposite side as you cycle your legs and bring closer your left elbow to your right knee and exhale.
- Continue alternating in this manner until all of the recommended repetitions for each side have been completed.
Notes: While you cannot add resistance to this exercise you can concentrate on perfect execution and slow speed.
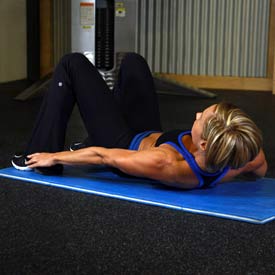
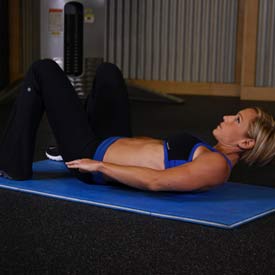
ALTERNATE HEAL TOUCHES
Main Muscle Worked: Abdominals
Equipment: None
Guide:
- Lie on the floor with the knees bent and the feet on the floor around 18-24 inches apart. Your arms should be extended by your side. This will be your starting position.
- Crunch over your torso forward and up about 3-4 inches to the right side and touch your right heel as you hold the contraction for a second. Exhale while performing this movement.
- Now go back slowly to the starting position as you inhale.
- Now crunch over your torso forward and up around 3-4 inches to the left side and touch your left heel as you hold the contraction for a second. Exhale while performing this movement and then go back to the starting position as you inhale. Now that both heels have been touched, that is considered 1 repetition.
- Continue alternating sides in this manner until all prescribed repetitions are done.
Variations: None
BOTTOMS UP
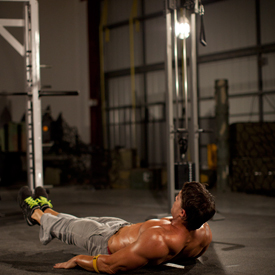
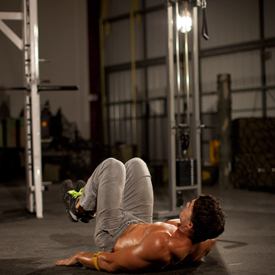
Main Muscle Worked: Abdominals
Equipment: None
Guide:
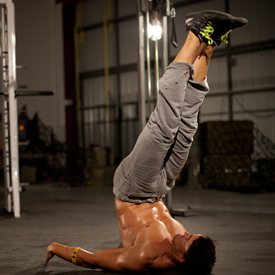
- Begin by lying on your back on the ground. Your legs should be straight and your arms at your side. This will be your starting position.
- To perform the movement, tuck the knees toward your chest by flexing the hips and knees. Following this, extend your legs directly above you so that they are perpendicular to the ground. Rotate and elevate your pelvis to raise your glutes from the floor.
- After a brief pause, return to the starting position.
LATS
CHIN-UPS
Main Muscle Worked: Lats
Other Muscles: Biceps, Forearms, Middle Back
Equipment: Pull-up Bar
Guide:
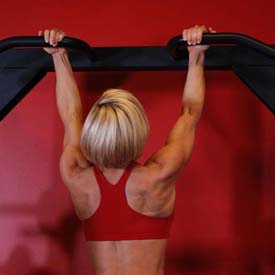
- Grab the pull-up bar with the palms facing your torso and a grip closer than the shoulder width.
- As you have both arms extended in front of you holding the bar at the chosen grip width, keep your torso as straight as possible while creating a curvature on your lower back and sticking your chest out. This is your starting position. Tip: Keeping the torso as straight as possible maximizes biceps stimulation while minimizing back involvement.
- As you breathe out, pull your torso up until your head is around the level of the pull-up bar. Concentrate on using the biceps muscles in order to perform the movement. Keep the elbows close to your body. Tip: The upper torso should remain stationary as it moves through space and only the arms should move. The forearms should do no other work other than hold the bar.
- After a second of squeezing the biceps in the contracted position, slowly lower your torso back to the starting position; when your arms are fully extended. Breathe in as you perform this portion of the movement.
- Repeat this motion for the prescribed amount of repetitions.
Variations:
- If you are new at this exercise and do not have the strength to perform it, use a pull-up assist machine if available. These machines use weight to help you push your bodyweight.
- Otherwise, a spotter holding your legs can help.
- On the other hand, more advanced lifters can add weight to the exercise by using a weight belt that allows the addition of weighted plates.
PULL-UPS
Main Muscle Worked: Lats
Other Muscles: Biceps, Middle Back
Equipment: Pull-up bar
Guide:
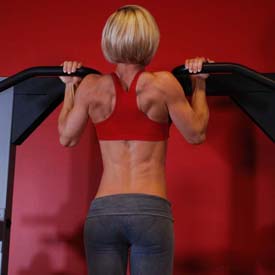
- Grab the pull-up bar with the palms facing forward using the prescribed grip. Note on grips: For a wide grip, your hands need to be spaced out at a distance wider than your shoulder width. For a medium grip, your hands need to be spaced out at a distance equal to your shoulder width and for a close grip at a distance smaller than your shoulder width.
- As you have both arms extended in front of you holding the bar at the chosen grip width, bring your torso back around 30 degrees or so while creating a curvature on your lower back and sticking your chest out. This is your starting position.
- Pull your torso up until the bar touches your upper chest by drawing the shoulders and the upper arms down and back. Exhale as you perform this portion of the movement. Tip: Concentrate on squeezing the back muscles once you reach the full contracted position. The upper torso should remain stationary as it moves through space and only the arms should move. The forearms should do no other work other than hold the bar.
- After a second on the contracted position, start to inhale and slowly lower your torso back to the starting position when your arms are fully extended and the lats are fully stretched.
- Repeat this motion for the prescribed amount of repetitions.
Variations:
- If you are new at this exercise and do not have the strength to perform it, use a chin assist machine if available. These machines use weight to help you push your bodyweight.
- Otherwise, a spotter holding your legs can help.
- On the other hand, more advanced lifters can add weight to the exercise by using a weight belt that allows the addition of weighted plates.
- The behind the neck variation is not recommended as it can be hard on the rotator cuff due to the hyperextension created by bringing the bar behind the neck.
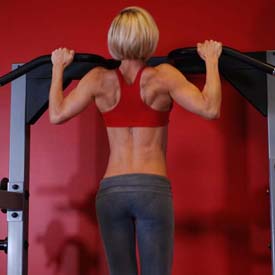
V-BAR PULL-UPS
Main Muscle Worked: Lats
Other Muscles: Biceps, Middle Back, Shoulders
Equipment: V-bar
Guide:
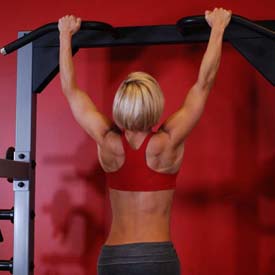
- Start by placing the middle of the V-bar in the middle of the pull-up bar (assuming that the pull-up station you are using does not have neutral grip handles). The V-Bar handles will be facing down so that you can hang from the pull-up bar through the use of the handles.
- Once you securely place the V-bar, take a hold of the bar from each side and hang from it. Stick your chest out and lean yourself back slightly in order to better engage the lats. This will be your starting position.
- Using your lats, pull your torso up while leaning your head back slightly so that you do not hit yourself with the chin-up bar. Continue until your chest nearly touches the V-bar. Exhale as you execute this motion.
- After a second hold on the contracted position, slowly lower your body back to the starting position as you breathe in.
- Repeat for the prescribed number of repetitions.
Variations:
- If you are new at this exercise and do not have the strength to perform it, use a pull-up assist machine if available. These machines use weight to help you push your bodyweight.
- Otherwise, a spotter holding your legs can help.
On the other hand, more advanced lifters can add weight to the exercise by using a weight belt that allows the addition of weighted plates.
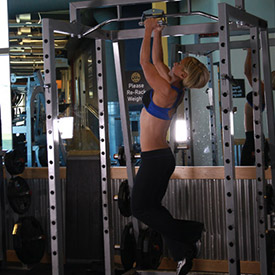
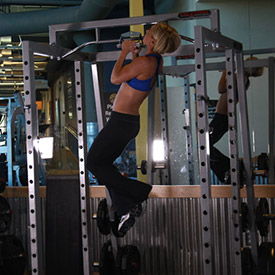
GLUTES
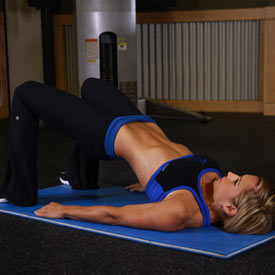
BUTT LIFT (BRIDGE)
Main Muscle Worked: Glutes
Other Muscles: Hamstrings
Equipment: None
Guide:
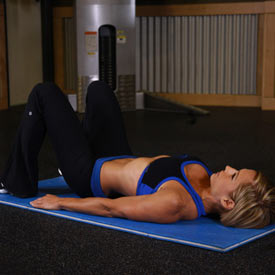
- Lie flat on the floor on your back with the hands by your side and your knees bent. Your feet should be placed around shoulder width. This will be your starting position.
- Pushing mainly with your heels, lift your hips off the floor while keeping your back straight. Breathe out as you perform this part of the motion and hold at the top for a second.
- Slowly go back to the starting position as you breathe in.
Variations: You can perform this exercise one leg at a time.
PHYSIOBALL HIP BRIDGE
Main Muscle Worked: Glutes
Other Muscles: Hamstrings
Equipment: None
Guide:
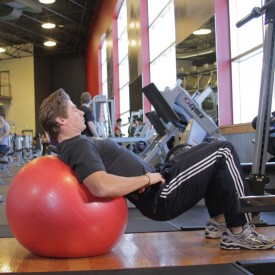
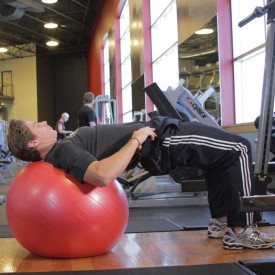
- Lay on a ball so that your upper back is on the ball with your hips unsupported. Both feet should be flat on the floor, hip width apart or wider. This will be your starting position.
- Begin by extending the hips using your glutes and hamstrings, raising your hips upward as you bridge.
- Pause at the top of the motion and return to the starting position.
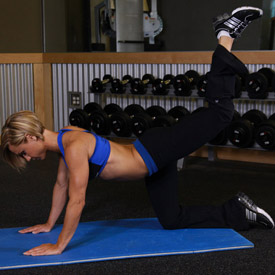
GLUTE KICKBACK
Main Muscle Worked: Glutes
Other Muscles: Hamstrings
Equipment: None
Guide:
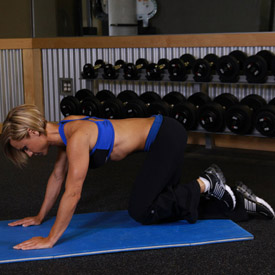
- Kneel on the floor or an exercise mat and bend at the waist with your arms extended in front of you (perpendicular to the torso) in order to get into a kneeling push-up position but with the arms spaced at shoulder width. Your head should be looking forward and the bend of the knees should create a 90-degree angle between the hamstrings and the calves. This will be your starting position.
- As you exhale, lift up your right leg until the hamstrings are in line with the back while maintaining the 90-degree angle bend. Contract the glutes throughout this movement and hold the contraction at the top for a second. Tip: At the end of the movement the upper leg should be parallel to the floor while the calf should be perpendicular to it.
- Go back to the initial position as you inhale and now repeat with the left leg.
- Continue to alternate legs until all of the recommended repetitions have been performed.
Variations: For this exercise you can also perform all of the repetitions with one leg first and then the other one. Additionally, you can also add ankle weights.
FLUTTER KICKS
Main Muscle Worked: Glutes
Other Muscles: Hamstrings
Equipment: Bench
Guide:
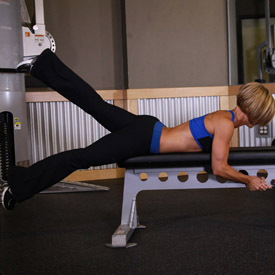
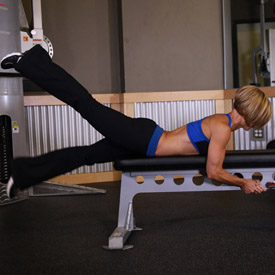
- On a flat bench lie facedown with the hips on the edge of the bench, the legs straight with toes high off the floor and with the arms on top of the bench holding on to the front edge.
- Squeeze your glutes and hamstrings and straighten the legs until they are level with the hips. This will be your starting position.
- Start the movement by lifting the left leg higher than the right leg.
- Then lower the left leg as you lift the right leg.
- Continue alternating in this manner (as though you are doing a flutter kick in water) until you have done the recommended amount of repetitions for each leg. Make sure that you keep a controlled movement at all times. Tip: You will breathe normally as you perform this movement.
Variations: As you get more advanced you can use ankle weights.
SINGLE LEG GLUTE BRIDGE
Main Muscle Worked: Glutes
Other Muscles: Hamstrings
Equipment: None
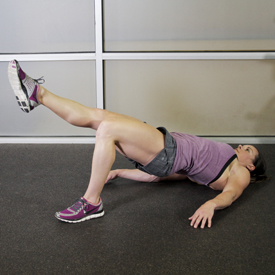
Guide:
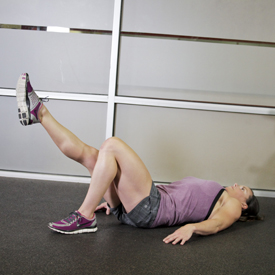
- Lay on the floor with your feet flat and knees bent.
- Raise one leg off of the ground, pulling the knee to your chest. This will be your starting position.
- Execute the movement by driving through the heel, extending your hip upward and raising your glutes off of the ground.
- Extend as far as possible, pause and then return to the starting position.
STEP-UP WITH KNEE RAISE
Main Muscle Worked: Glutes
Other Muscles: Hamstrings, Quadriceps
Equipment: None
Guide:
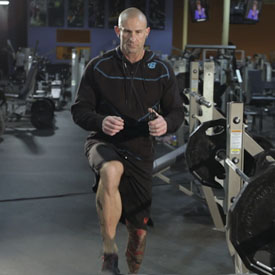
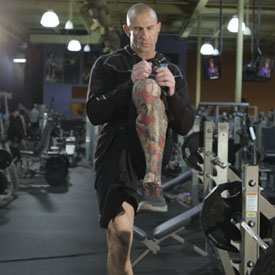
- Stand facing a box or bench of an appropriate height with your feet together. This will be your starting position.
- Begin the movement by stepping up, putting your left foot on the top of the bench. Extend through the hip and knee of your front leg to stand up on the box. As you stand on the box with your left leg, flex your right knee and hip, bringing your knee as high as you can.
- Reverse this motion to step down off the box, and then repeat the sequence on the opposite leg.
LEG LIFTS
Main Muscle Worked: Glutes
Other Muscles: Hamstrings
Equipment: None
Guide:
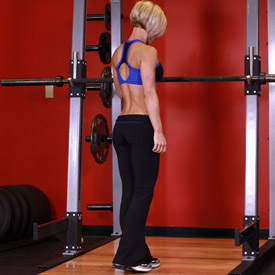
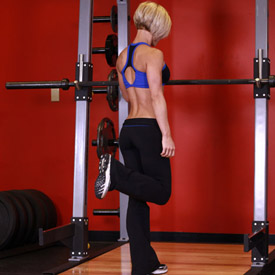
- While standing up straight with both feet next to each other at around shoulder width, grab a sturdy surface such as the sides of a squat rack or the top of a chair to brace yourself and keep balance.
- With or without an ankle weight, lift one leg behind you as if performing a leg curl but standing up while keeping the other leg straight. Breathe out as you perform this movement.
- Slowly bring the raised leg back to the floor as you breathe in.
- Repeat for the recommended amount of repetitions.
- Repeat the movement with the opposite leg.
Variations: You can perform the same movement with a low pulley attached to your ankle using an ankle attachment. Optionally, you can use exercise cables as well.
